
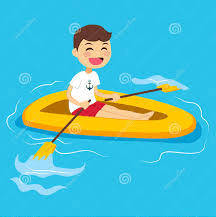
Today’s post is all about the row machine! This piece of equipment is far too underutilized even though it has oodles of benefits for noodle arms (or nearly any other weak body parts). It gets you strong, utilizes the whole body, crushes calories, and best of all… you get to sit! So let’s dive into the wonders of rowing.
What Could Be Better?
There’s almost an innumerable amount of benefits to rowing. How could one machine be low impact, strengthening, and cardio all in one? Well, here’s how:
Rowing uses around 86% of the body’s muscles including the upper back, arms, legs, and, yes, even core, which means more calories burned, great heart health, and tremendous bang for your buck.
Depending on how you us it, you can develop power (short pieces), endurance (long pieces), and strength endurance (middle distance pieces).
It has great crossover effect, which means it can be used to develop aptitude in other exercises such as the squat, dead lift, or other weighted rowing motions.
Also, it’s super safe due to minimal impact loading, so it is safe for those with a history of ankle, knee, or hip injuries.
What to Know Before You Go Row
There are three key things to know about the row machine for those beginners out there. They are 1) the Damper setting 2) Flex Foot position, and 3) Performance Monitor adjustment. The damper setting affects wind resistance and subsequently the speed of the stroke: the lower the setting, the less wind resistance and faster the stroke. So basically, the harder you pull, the more resistance will be felt with each stroke – making the workout more challenging. Depending on your goal, you will need to play with different settings, record results and “tweak” as needed. The flex foot is where the feet are fixated, and it needs to be adjusted according to foot size. Just make sure that the anchor strap is secured directly over the ball of the foot for optimal performance. The performance monitor is an essential component to rowing and displays quantitative information for you to analyze the performance of each row. Key features include time, distance, speed as time per 500 meters, watts, and calories per hour. The time per 500 meters is my favorite to watch because it represents to a rower the same as what time per mile represents for a runner.
Technique
As with any other exercise, technique is crucial for attaining benefits and shunning away the bad stuff like injuries (just like Gryffindor’s sword). So here are the step by step instructions for a beginner.
1 – Turn the machine on, set resistance to low, secure your feet so they don’t move around as you slide, and grab the handle using an overhand grip, but don’t hold too tightly
2 – Pull the handle with you as you slide to the end of the machine. Your legs should be straight, but knees should still have a slight bend in them so they aren’t locked. Lean back slightly and pull your hands up to your chest, holding the handle so it is right below your pecs, with elbows pointing down against your sides.
3 – THE RECOVERY is when you start to come forward towards the starting position. To do this properly, move your arms out first, followed by your upper body. Your back should always stay straight, not slumped, with shoulders back and abs engaged as you follow through. As your arms extend out, your upper body position will go from slightly angled back to slightly angled forward.
4 – THE CATCH is when you make your way back to the starting position. As your arms extend and body leans forward, slide your body forward on the seat by bending your legs. Once you are at the top of the machine, your arms will be fully extended and legs will be bent.
5 – THE DRIVE is where the magic happens. This is where you push off with your feet first, so that your legs straighten, but your arms are still extended and your body is still slightly leaning forward working the leg and core muscles the most.
6 – THE FINISH starts when your torso begins to lean back, followed quickly by your arms; as your upper body angles back, pull the handle and bend your arms so that the handle ends up back to touching the front of your chest, just like how you started.
Caution
Here are a few things to look out for. DON’T grip the handle too hard; the power should be through your legs. Using too much force while pulling the cable can cause hand blisters as well as back problems. DON’T slump forward because the core muscles must act to keep the spine in neutral alignment so that power can be transferred from low to high and high to low through the kinetic chain. DON’T move your arms up and down as you row because raising and lowering of the handle during recovery is inefficient, involves more work and should be avoided for optimal rowing. DON’T push the seat away from the flywheel and then follow with the hands and torso. Instead, at the very beginning of the drive phase, make sure the seat and the handle move together for approximately ¼ of a slide, at which point the torso starts to hinge followed by the arm pull. DON’T lean back like you’re taking a nap in your car (or Fat Joe) because it increases the workload on the abdominals, slows pace and decreases overall performance. DON’T chicken wing by raising the elbows vertically at the finish of the stroke like you’re going to choke yourself with the bar.
Workouts!
Here’s the fun part… the workout options! There are a few basic options. I like to row for 10 minutes and see how far I get. You can do the reverse by seeing how long it takes you to get a certain distance (500m for beginners). I like to also use a Fartlek style of training where you go slow for one minute, medium pace for 45 seconds, and all out sprint for 15 seconds for 5-10 rounds. Once you have some experience under your belt, you can try an interval training plan such as this one, or place it strategically into a workout plan like this one. To sum it all up, rowing is a workout that you need to try. Once you master technique, you will be able to take on just about anything (except water)!

One thought on “There’s One Oar Two Benefits to This Exercise!”