Today’s post features a topic that is near and dear to my heart. This is because one of my passions lies in sports medicine, specifically Athletic Training (hence the ATC/L credentials). With that being said I want to remind everyone that I am not writing the content of these email, but merely sharing tips and tricks of the gym. So I feel I must say that what you are about to read is not intended to diagnose or treat anyone’s specific problem, and if you have any specific questions please visit your doctor 🙂
Okay lets get to the heart of this weeks topic EXERCISE INJURIES!!! Growing up without an ATC at any of my sporting event I had to do a lot of self assessment and treatment which is why I got my undergrad in Athletic Training. This post was written by Linda Melone on theprevention.com website, and features one of my favorite people to follow Dr. David Geier. It is very well written and features 8 injuries that I have seen/treated/experienced many times with excellent suggestions on how to avoid them.
1. Patella femoral overuse syndrome
Also known as patellofemoral pain syndrome (PFPS) and Runner Knee, this common problem manifests as pain under the kneecap that worsens when running, going down stairs, or sitting for long periods of time with knees bent. Tips to avoid this issue include strengthening the quadriceps muscles, as well as hamstrings and calves..
2. Rotator cuff tear
This injury involves damage to one of the four rotator cuff muscles that keeps your shoulder socket in place. Avoid repetitive overhead motions, and consider seeing a doctor if you modify your workout to minimize pain without improvement for a few days.
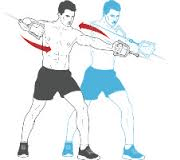
3. Anterior cruciate ligament (ACL) tear
This issue is more often than not a non-contact injury. It tends to happen when you land awkwardly from a jump, stop suddenly, change directions rapidly, and slowing down while running. There are many prevention programs, and bio-mechanics experts (cough cough) that can aid in preventing these injuries. However, preventative steps include always trying to land softly on your toes with your knees bent.
4. Boxer’s fracture
“Even if you’re not a fighter, participating in boxing classes or other training programs where you punch pads held by a trainer or you pummel a heavy bag can result in a boxer’s fracture.” I see these injuries more often in novice “punchers” and frustrated teenagers who punch the ground. Easy preventative steps include proper protection on your hands and again proper bio-mechanics.
5. Hamstring strain
Also known as a pulled muscle, these injuries can take as little as a few days or a week or two to heal or as much as six to eight weeks or even more! Prevention includes warming up thoroughly and knowing how/when to stretch.
6. Ankle fracture
These nasty injuries, along with ankle sprains, happen when you land awkwardly and invert or “twist” your ankle. Having proper proprioception (hand eye coordination) and making every effort to avoid landing on uneven surfaces are good strategies to avoid these problems.
7. Labral tear (shoulder)
I have had the unique pleasure of suffering, and getting surgery for, this injury myself! Although my injury was from a stiff arm during rugby, the author sums the core issue well as “Falling on an outstretched hand during a cardio class, a sudden pull trying to lift a heavy weight in CrossFit, or trying to stop yourself from falling can all result in this injury, defined as a tear of the cartilage bumper within the socket of the shoulder.” To avoid this injury, use a proper weight and, notice the common theme, use proper bio-mechanics.
8. Stress fracture
These tricky injuries also known as hairline fractures, often happen due to repetitive stress and usually take time to develop. Stress fractures are largely preventable if you stick to a plan that never increases your exercise by more than 10% per week and has varying routines.
I hope this post was informative, and if you want some more detail please read the article by clicking here.